In this blog post, we are going to discuss how to mount ZFS iSCSI LUNs that have already been formatted with NTFS inside SoftNAS to access data. This use case is mostly applicable in VMware environments where you have a single SoftNAS node on failing hardware and want to quickly migrate your data to a newer version of SoftNAS using rsync. However, this can also be applied to different iSCSI data recovery scenarios.
For the purposes of this Blog post, the following terminology will be used:
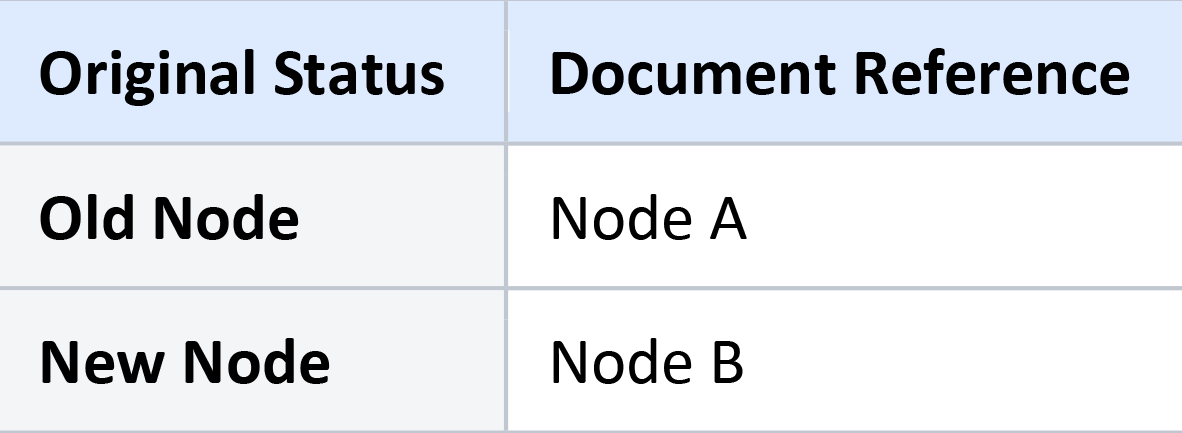
At this point, we assumed we already have our new SoftNAS (Node B) deployed, configured our pool and iSCSI LUN, and ready to receive the rsync stream from Node A. So we won’t be discussing that as that is not the main focus of this blog post
That said, let’s get started!
1. On Node B, do the following:
From UI go to Settings –> General System Settings –> Servers –> SSH Server –> Authentication –> and change Allow authentication by password? to “YES” and Allow login by root? to “YES”
Restart ssh server
NOTE: Please take note of these changes as you will need to revert them back to their defaults for security reasons
2. From Node A, set up SSH keys to push to Node B to allow a seamless rsync experience
Let’s set up SSH keys to push to Node B to allow a seamless rsync experience. After this step, we should be able to connect to Node B using root@Node-B-IP without requiring a password. However, if a passphrase was set, you will be required to provide the passphrase every time you try to connect via ssh. So in the interest of convenience and time don’t use a passphrase. Just leave it blank:
a. Create the RSA Key Pair:
# ssh-keygen -t rsa -b 2048
b. Use default location /root/.ssh/id_rsa and setup passphrase if required.
c. The public key is now located in /root/.ssh/id_rsa.pub
d. The private key (identification) is now located in /root/.ssh/id_rsa
3. Copy the public key to Node B
Using the ssh-copy-id command. Where user and IP address should be replaced with node B’s credentials.
Example:
# ssh-copy-id root@10.0.2.97
Alternatively, copy the content of /root/.ssh/id_rsa.pub to /root/.ssh/authorized_keys on the second server.
Now we are ready to mount our iSCSI volume on Node A and node B respectively. A single volume on each node is used on this blog post but the steps apply to multiple iSCSI volumes as well.
Before we proceed, please make sure that no ZFS iSCSI LUNs are mounted in Windows before proceeding to step #4 if not all NTFS volumes will mount as read-only inside SoftNAS Cloud NAS which is not what we really want. This is because our current iSCSI implementation doesn’t allow Multipath at the same time.
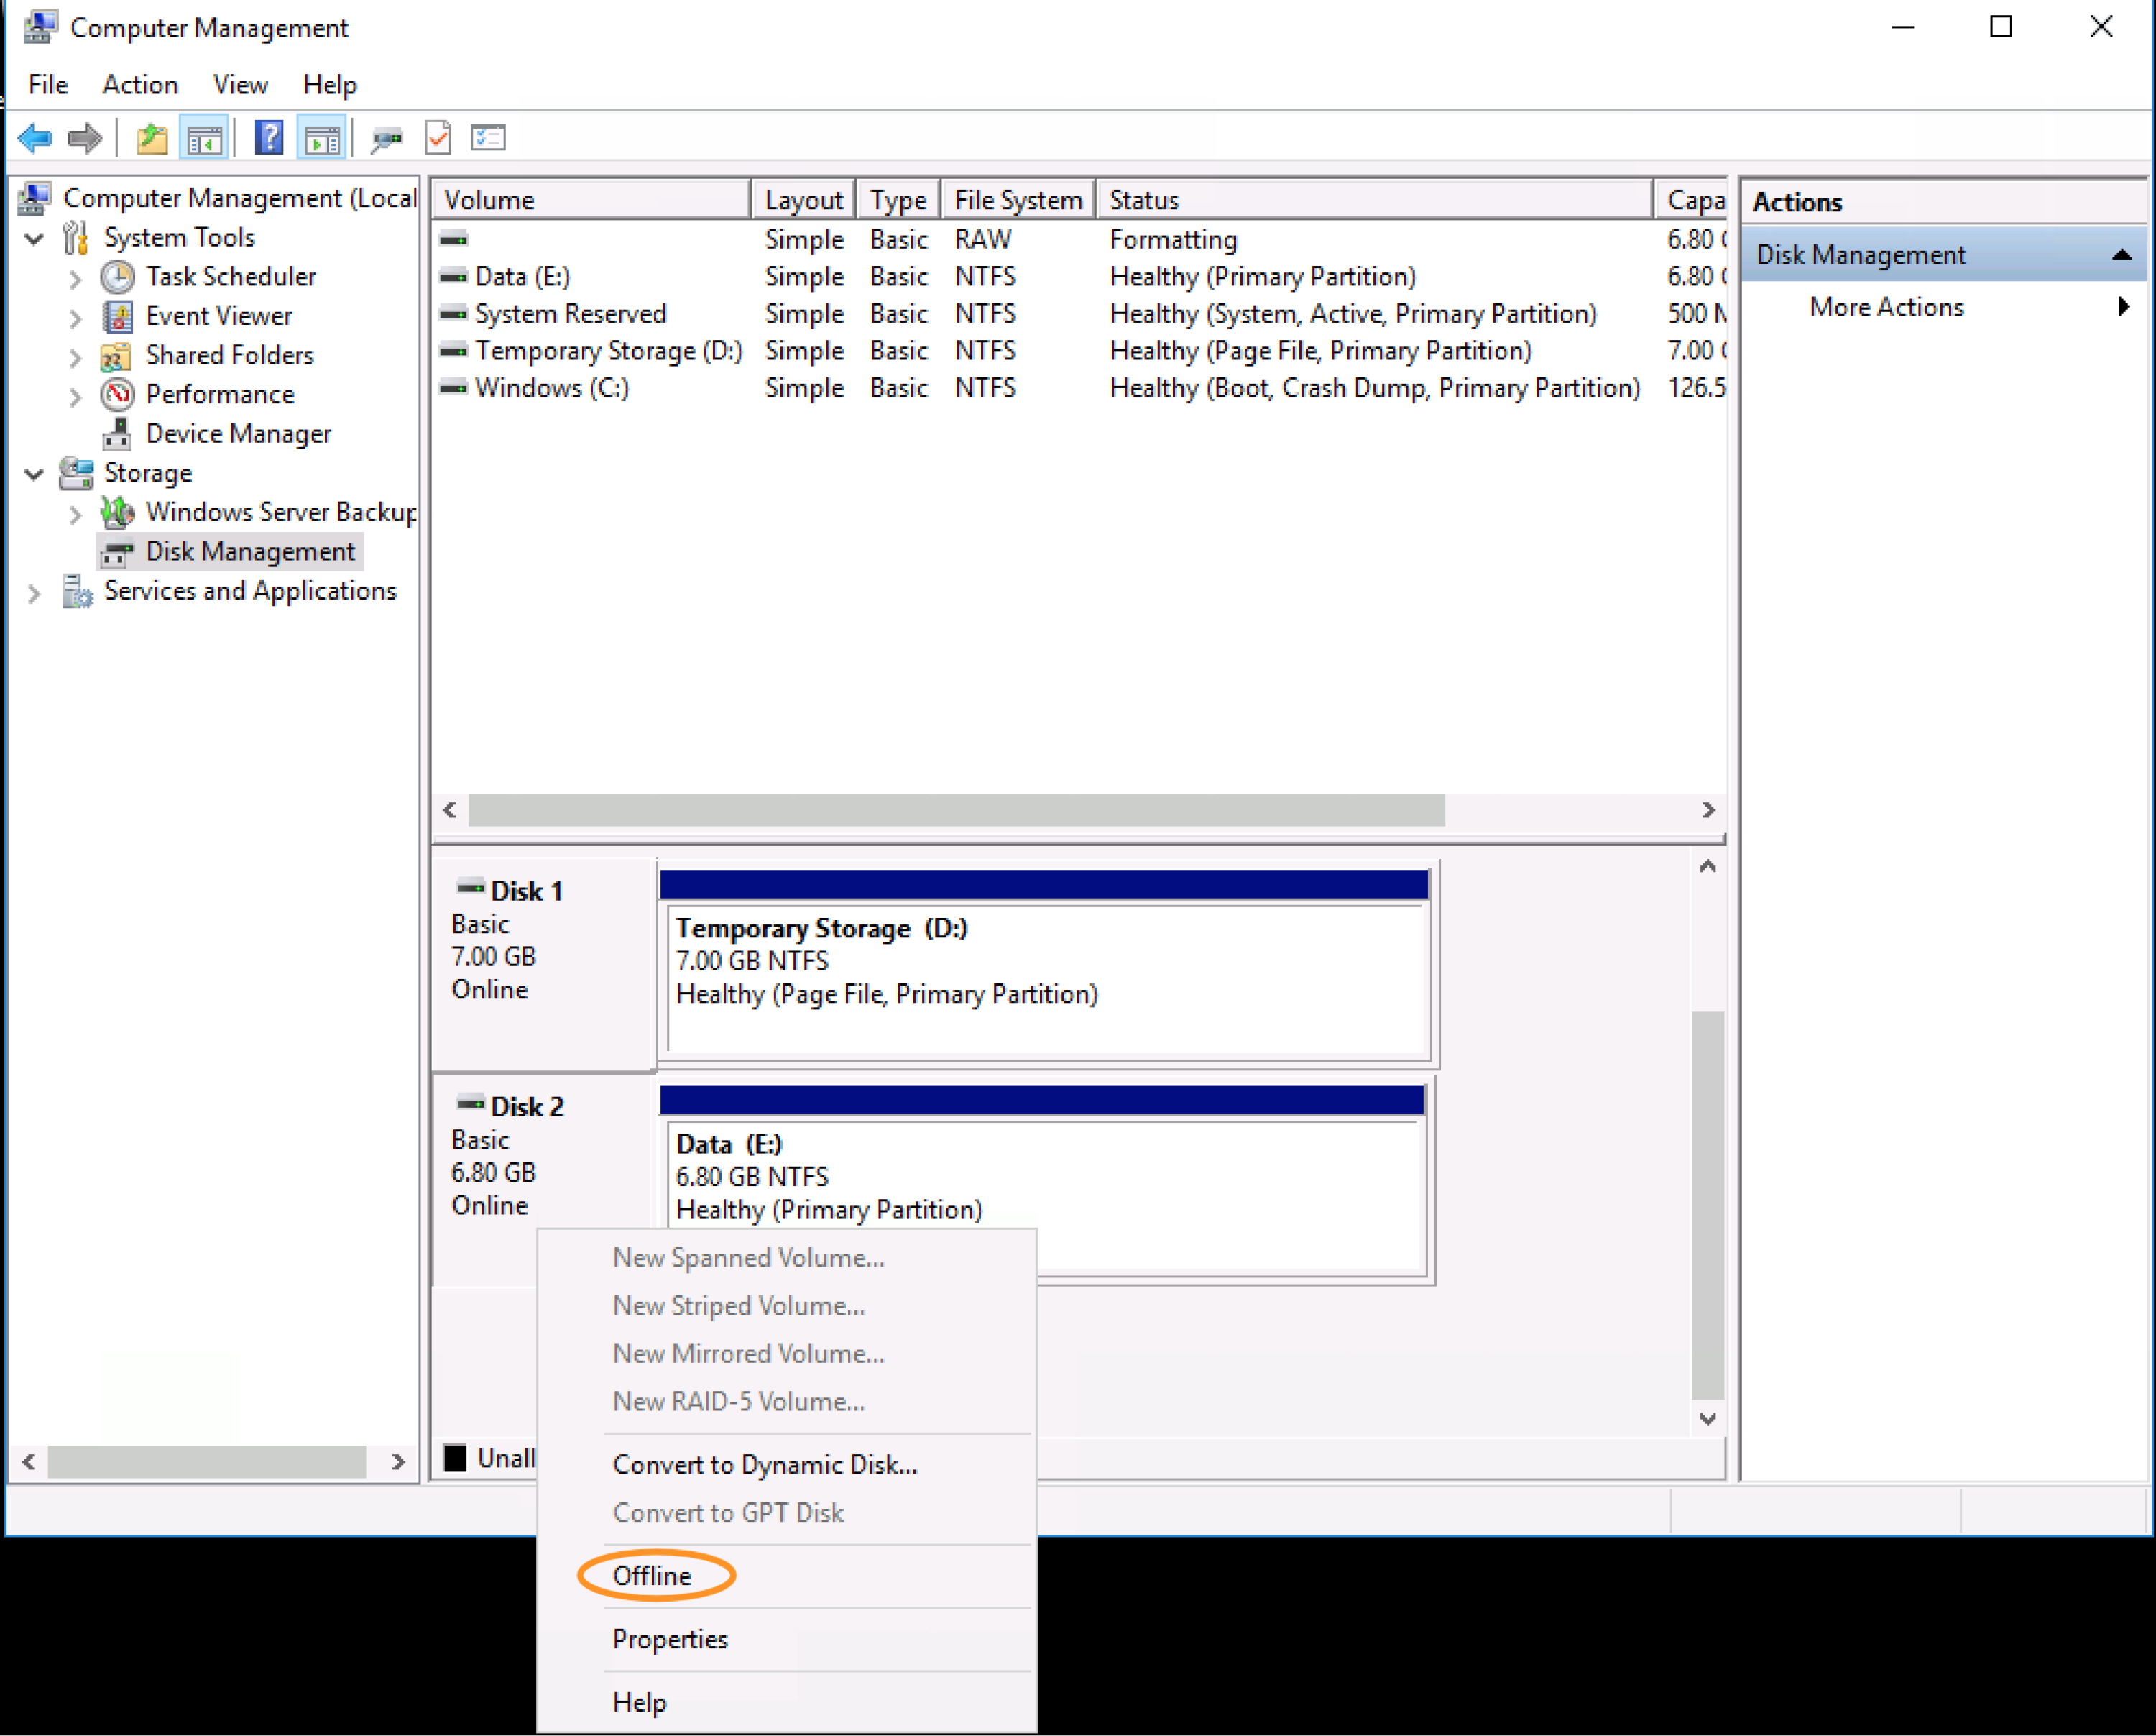
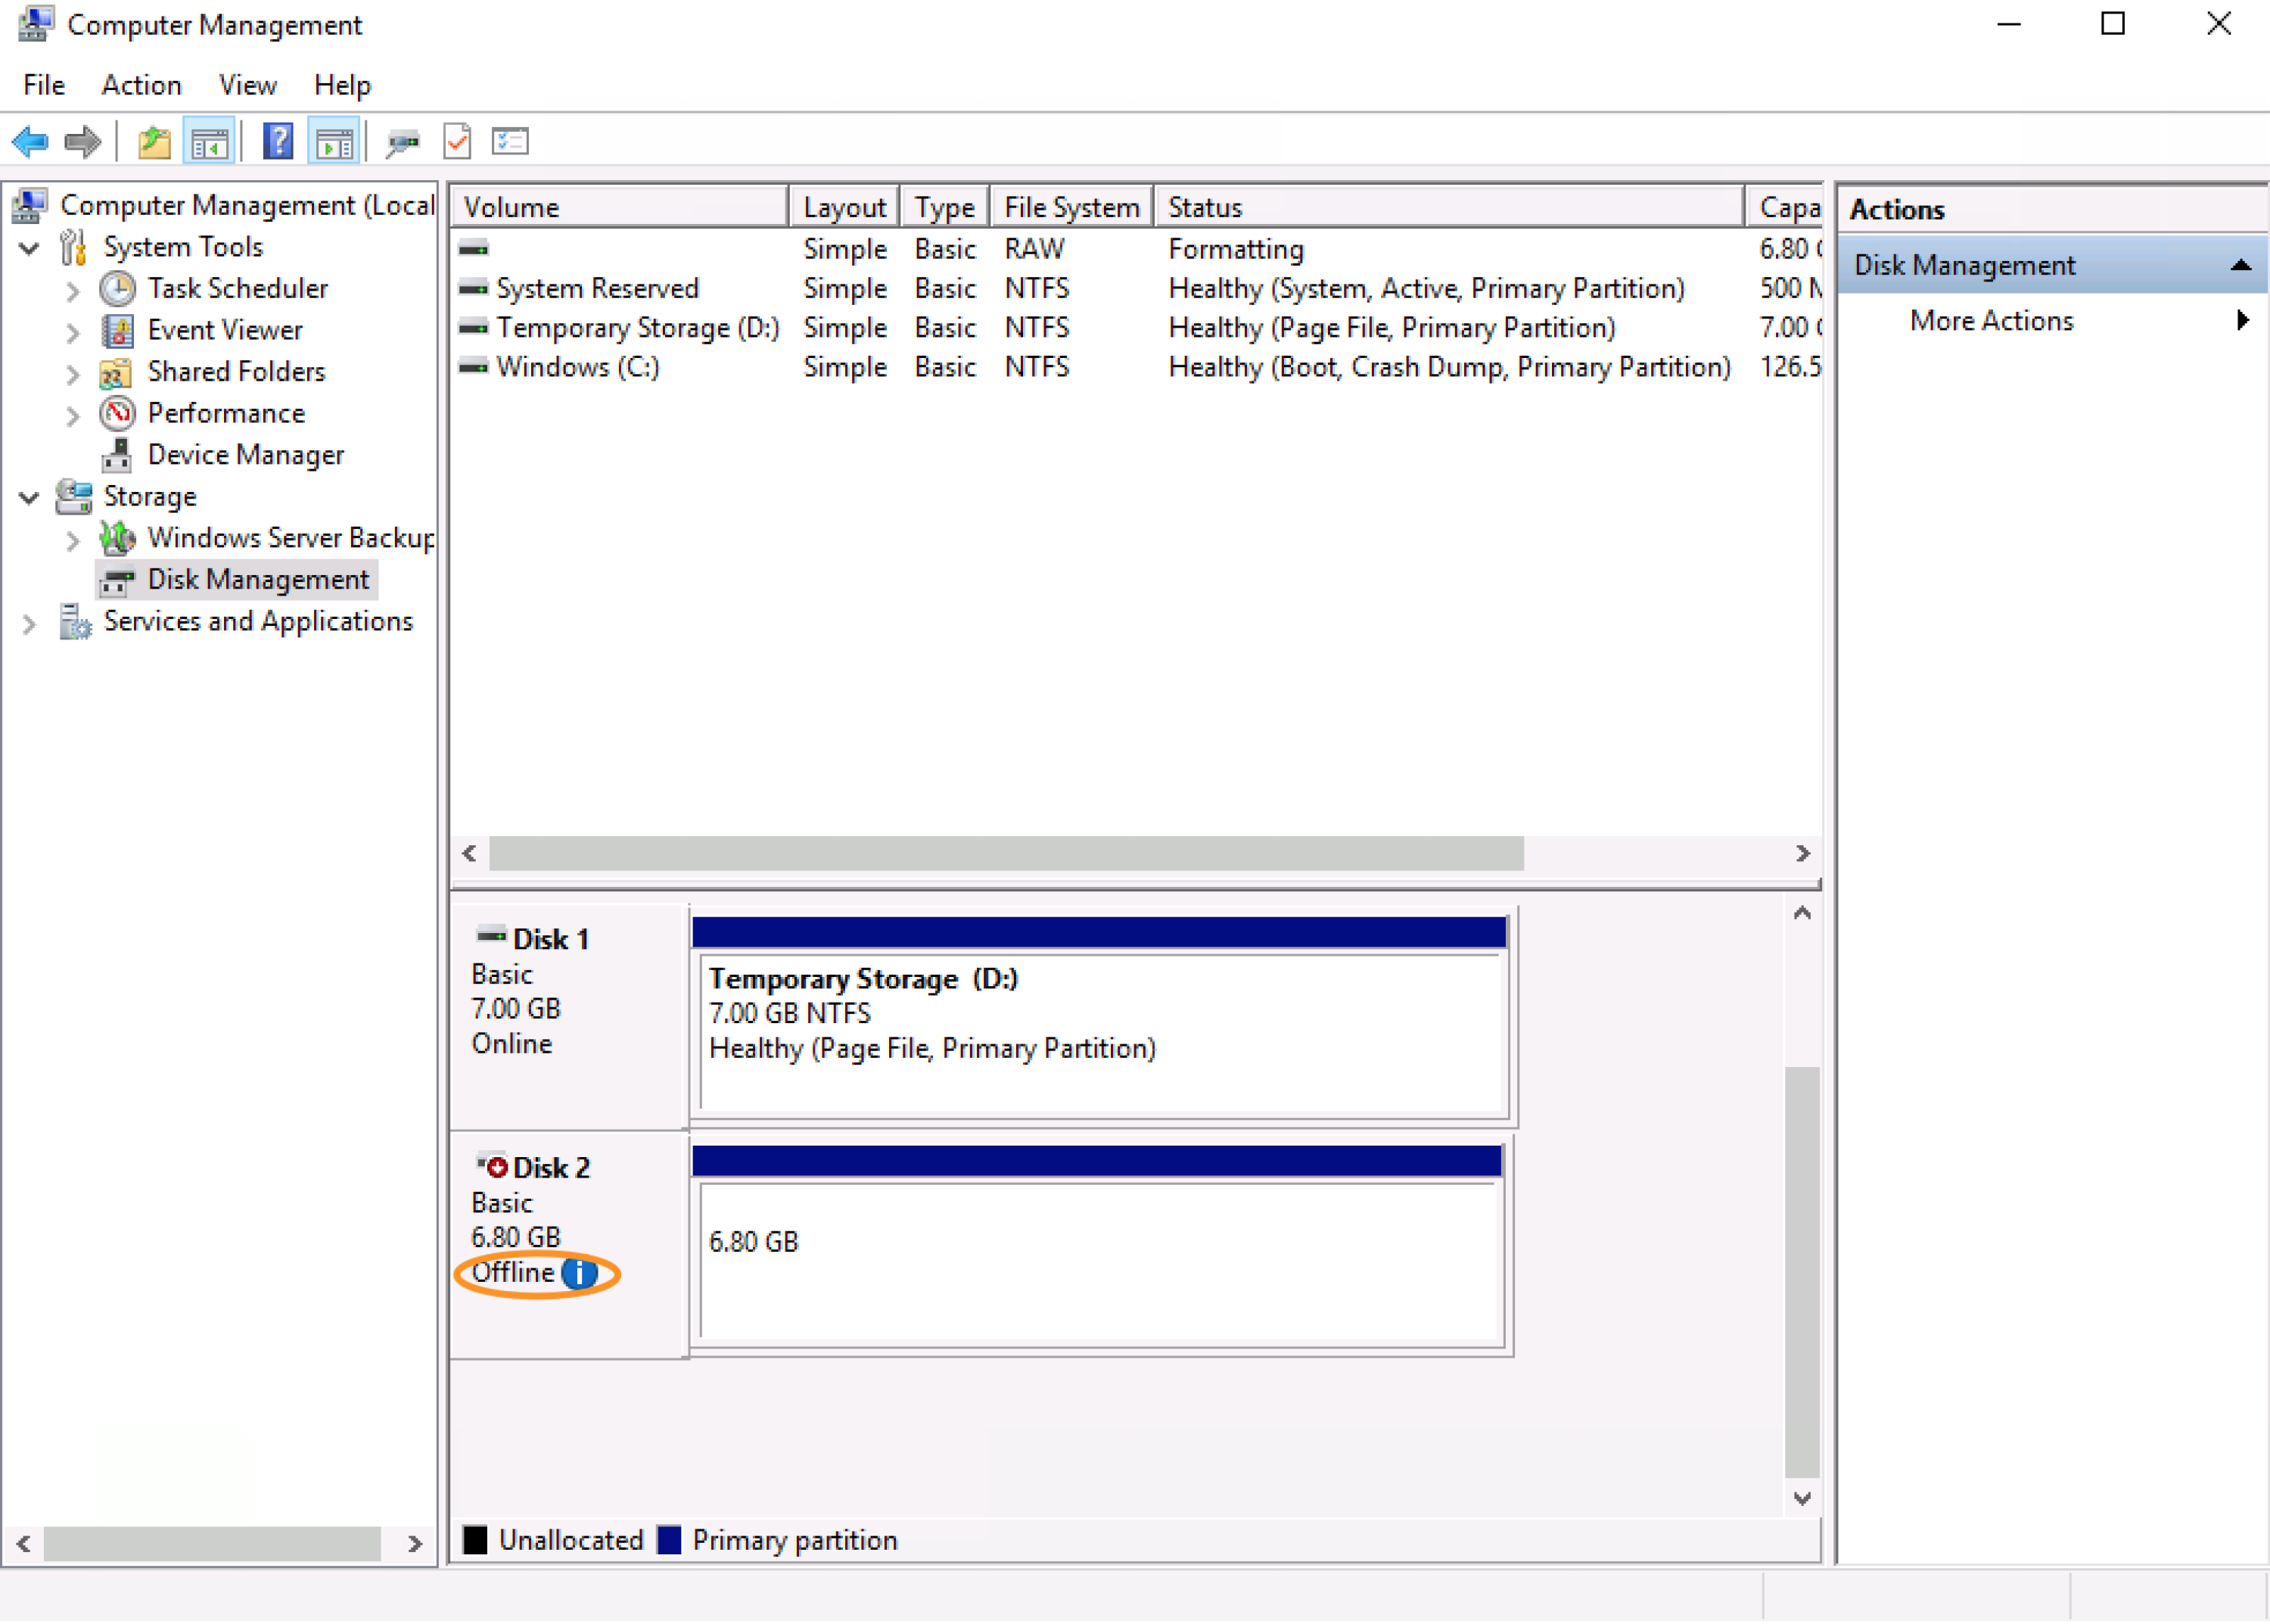
To unmount we can simply head over to “Computer Management” in Windows –> right-click on the iSCSI LUN and click “Offline”. Please see the screenshots below for reference
4. Mount the NTFS LUN inside SoftNAS
We need to install the package below on both Node A and Node B to allow us to mount the NTFS LUN inside SoftNAS/Buurst.
# yum install -y ntfs-3g
5. log in to the iSCSI LUN
Now from the CLI on Node A let’s login to the iSCSI LUN. We’ll run the commands below respectively while substituting the IP and the Target’s name with correct values from Node A:
# iscsiadm -m discovery -t st –portal 10.10.1.4
# iscsiadm -m node -T iqn.2020-07.com.softnas:storage.target1 -P 10.10.1.4 -l
Successfully executing the commands above will present you with the screenshot below:
6. iSCSI disk on Node A
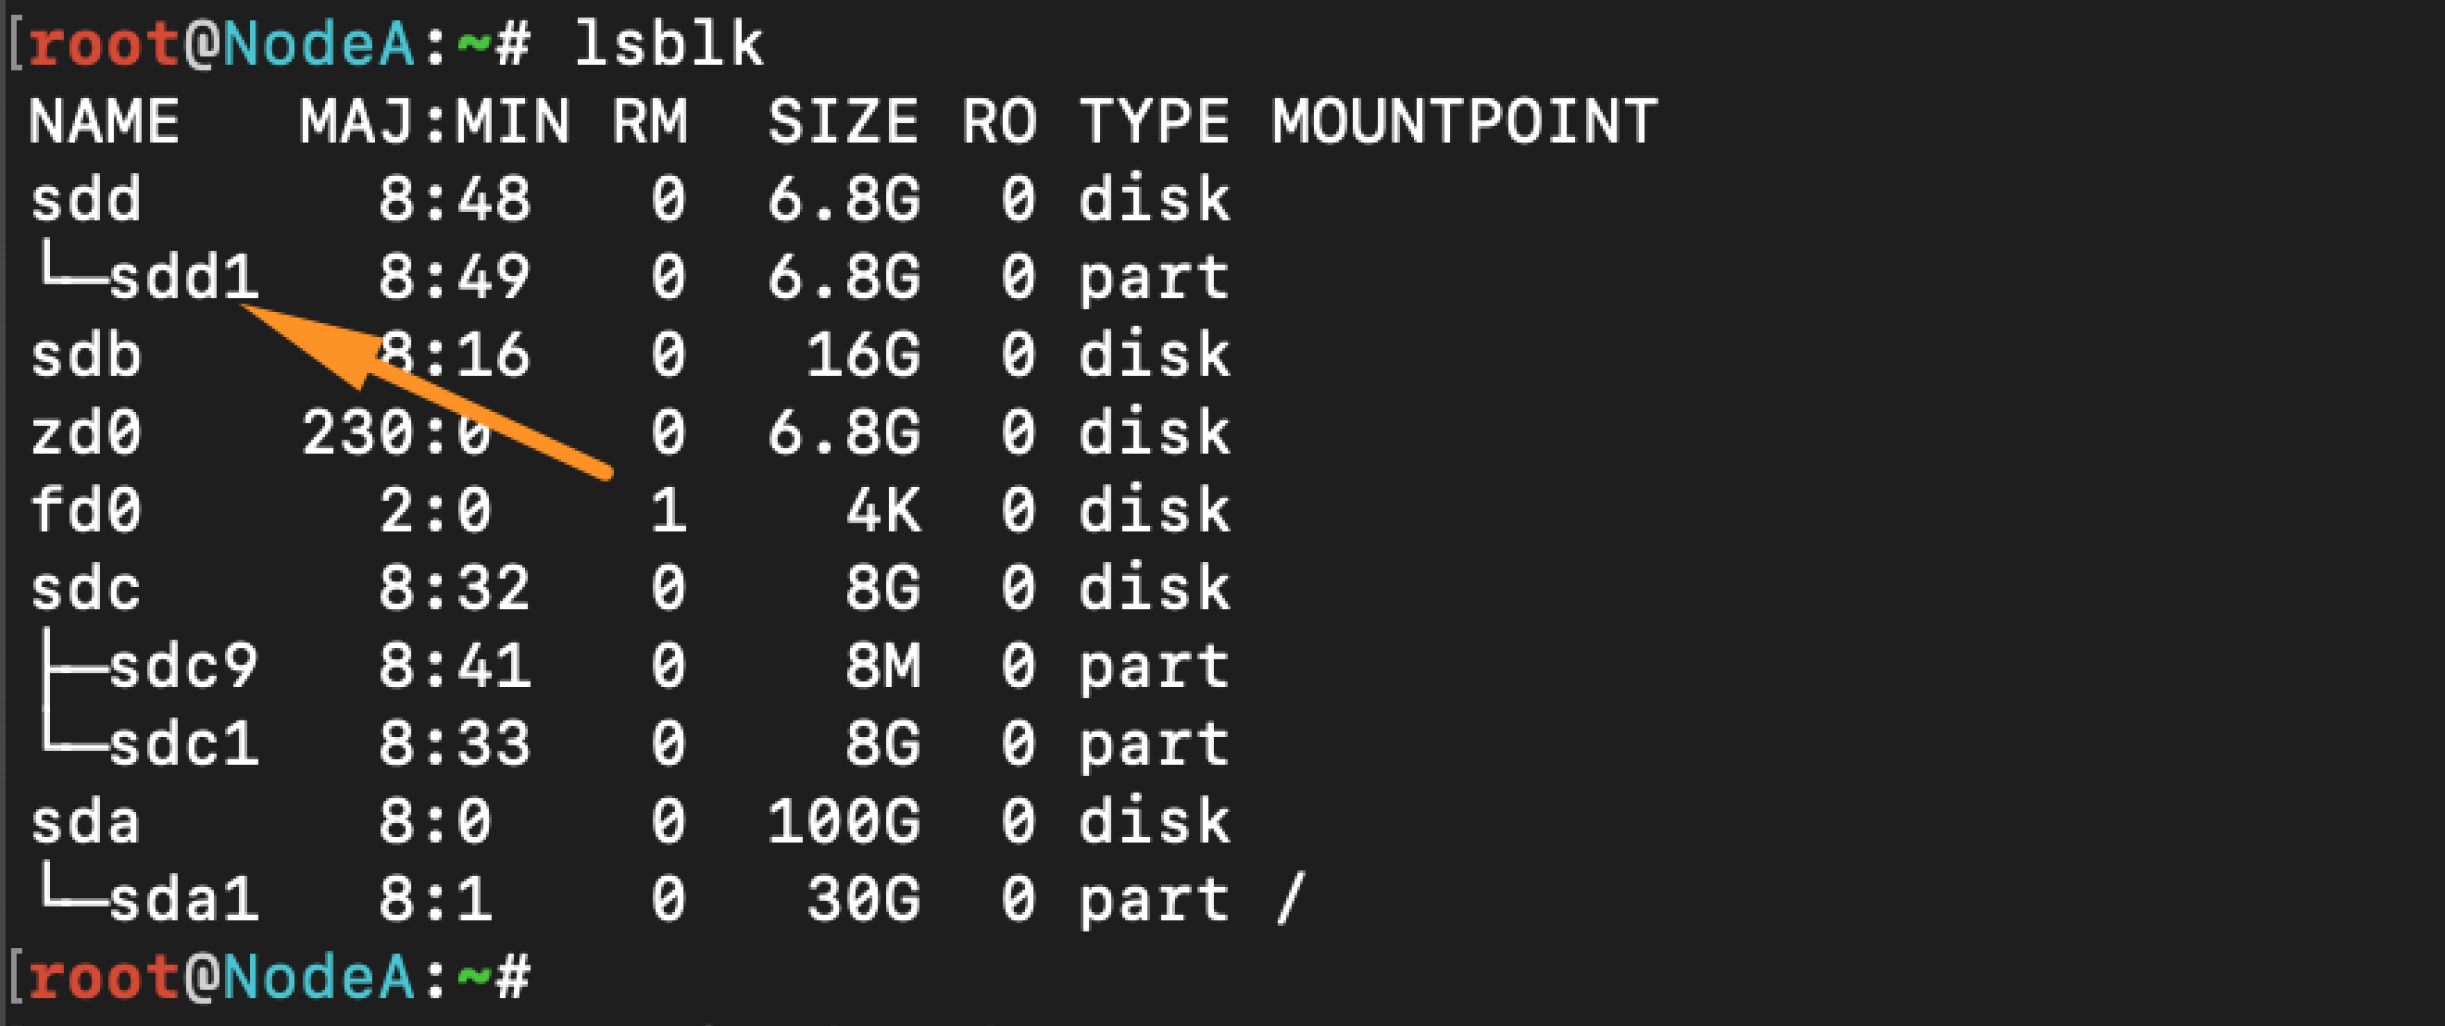
Now we can run lsblk to expose our new iSCSI disk on Node A. From the screenshot below, our new iSCSI disk is /dev/sdd1. You can run this command ahead of time to make sure that you take note of your current disk mappings before logging into the LUN. This will allow you to quickly identify the new disk after mounting. However, often times it is usually the first disk device from the output.
7. Mount NTFS Volume
Now we can mount our NTFS Volume to expose the data, but first, we’ll create a mount-point called /mnt/ntfs.
# mkdir /mnt/ntfs
# mount -t ntfs /dev/sdd1 /mnt/ntfs
The Configuration on Node A is complete!
8. rsync script Node A to Node B
On Node B let’s perform the steps # 5 to #7 but this time on Node B
Now we are ready to run our rsync script to copy our data over from Node A to Node B
9. Seeding data from Node A to Node B
We can run the command below on Node A to start seeding the data over from Node A to Node B
# rsync -Aavh /mnt/ntfs/* root@10.10.1.7:/mnt/ntfs


